Background

Tuesday, November 6, 2012

Chocolate Chip Pumpkin Spice Bread - by Lisa

It's Tuesday, and I'm posting an entry, AND IT'S A RECIPE! Really, this shouldn't be so difficult to do, right?

Anywho, the super good news about today's recipe is that it is ridiculously easy. So easy in fact I could have my 4 1/2 year old make it. :) All you need are 3 ingredients: boxed spice cake mix, can of pure pumpkin, and some chocolate chips.


Seriously - that's it!! (I seem to be on a kick here with my super simple recipes.) Put it all together, bake at 350 and you're done! My friend Melanie passed along the recipe to me years ago. It's so simple that I don't even have it written down anywhere - LOL!!

Chocolate Chip Pumpkin Spice Bread
Recipe from Melanie

Ingredients:
  • Boxed spice cake mix (I used Betty Crocker)
  • 15.5 oz can pure pumpkin
  • 1 1/2 cups chocolate chips
Directions:
  1. Preheat oven to 350°.
  2. Mix all the ingredients together in a bowl. 
  3. Pour into bread pan or cupcake pan.
  4. Bake 30-35 min or until toothpick comes out clean.

That's it!! Dig in and enjoy.... :)

Thursday, November 1, 2012

Pumpkin Bars with Cream Cheese Frosting by Summer

We had friends over for dinner on Saturday night. It was an easy dinner of pizza because they also have two small children and who doesn't like pizza!  I offered to make dessert because, well . . . like that needs an explanation :-) I was trying to figure out what to make that would be yummy, kid-friendly and easy. I found this in my dessert recipe binder. I love pumpkin bars, but they make so much! And that cream cheese frosting! I could eat these bars non-stop, so I knew they would be the perfect dessert!

In the past I have made these in a 9x13 pan, but this time I used the 10x15 pan that the recipe calls for.  Try these if you like pumpkin at all!


 Using a large off-set spatula really helped making frost these easy! Be sure to spread it on nice and thick!


Pumpkin Bars (unfortunately I don't know the source for this recipe)
  • 4 eggs
  • 1 2/3 cups white sugar
  • 1 cup vegetable oil
  • 1 (15 ounce) can pumpkin puree
  • 2 cups all-purpose flour
  • 2 teaspoons baking powder
  • 1 teaspoon baking soda
  • 2 teaspoons ground cinnamon
  • ¼ teaspoon salt
  • ¼ teaspoon ground cloves
Preheat oven to 350 degrees.
In a medium bowl, mix the eggs, sugar, oil and pumpkin with an electric mixer until light and fluffy. Sift together the flour, baking powder, baking soda, cinnamon and salt. Stir into the pumpkin mixture until thoroughly combined.
Spread the batter evenly into an ungreased 10×15 inch jellyroll pain. Bake for 25 to 30 minutes in preheated oven. Cool before frosting.
Cream Cheese Frosting
  • 1 (8 ounce) package cream cheese, softened
  • 1/2 cup butter, softened
  • 1 teaspoon vanilla extract
  • 2 cups sifted confectioners’ sugar
To make the frosting, cream together the cream cheese and butter. Stir in vanilla. Add confectioners’ sugar a little at a time, beating until mixture is smooth. Spread evenly on top of the cooled bars. Cut into squares.

Tuesday, October 30, 2012

Happy Halloween Again! - by Lisa

I'm totally going to copy Summer on this post because, well....I got nuttin'. I just haven't been making any new dessert recipes lately despite being busy with quite a bit of baking. :( I hope next month I can do a better job.

So this is my third round of spiderweb cookies in the last three weeks. I found this giant (seriously, giant - 7 inch diameter!) spider web cookie cutter while shopping for a different shape. It even came with a little spider cutter, but I didn't have enough dough for them this time around. I was going to use these as little gift treats for Caiden's class (yes, apparently I'm turning into "that" classroom mom), but they were even too big for the treat bags! I hemmed and hawed over what to do since I really wanted to make these cut outs, and finally split the difference. I went the "old school" route for the classroom treats and made 4 big ones for us to enjoy at home. Yay win!


"You are getting sleepy....very very sleepy...."
 Since I still had leftover treat bag decorations from the bake sale last week, I put those to good use on these treats! On the back I have a "to/from" sticker. I hope the kids get a kick out of these cookies! :)


Hope you have a safe and happy Halloween this year!

Thursday, October 25, 2012

Happy Halloween!

It's been a busy week for me, so unfortunately I just can't come up with a recipe to post here.  Instead - here is a picture of some cookies that I made for a couple of Halloween parties that are coming up.  Hope you have a great Halloween and I promise to have a great recipe for next week!


Thursday, October 18, 2012

Cranberry Muffins - by Summer


One of my favorite foods is in season during fall - cranberries!  I love cranberry juice and I love making whole cranberry sauce for the holidays (true story, until I was in high school, I thought the only kind of cranberry sauce was that jellied stuff that came in a can - I still love that too!)  Anyhow - I purchased a bag of cranberries at my supermarket a couple of weeks ago and they have been sitting in my fridge ever since.  Finally a few days ago I decided to make some muffins with half of them.  This recipe is from my mom, again and it makes a lot.  When looking at recipes for cranberries, I discovered that most of them call for dried cranberries, but these do call for the whole fresh ones!  I bet they would taste even better with some white chocolate chips thrown in too!

Cranberry Muffins - recipe from JoAnne Blume

1 1/2 cup cranberries (cut berries in half)
1 cup powdered sugar
4 cups flour
6 teaspoons baking powder
1 teaspoon salt
1/2 cup sugar
2 eggs beaten
2 cups milk
1/2 cup melted unsalted butter

Toss cranberries with powdered sugar and set aside. Sift dry ingredients together in a large bowl. Make a well in the flour mixture and add eggs, milk, and butter all at once. Stir lightly until combined - do not beat! Fold in cranberries. Pour into greased muffin pan until cups are 2/3 full.  Bake at 350 for 30 minutes.

Instead of regular muffins, I made mini ones (they are easier for my kids to handle) and I also made one mini loaf. I sprayed the pans with cooking spray.  The muffins baked for 20 minutes and the mini loaf baked for 40 minutes.

Wednesday, October 17, 2012

Tuesday Tips: Icing Bags - by Lisa

I know, I know...it's Wednesday, but I had you for a second there, right? I have been doing a lot of baking this week, but sadly none of the recipes are new ones. I made chocolate chip cookies, cornbread, gingersnaps, decorated sugar cookies, and I will be making carrot cake and scones tomorrow and Friday. Why the baking bonanza? Well part of it was for meals/snacks around here, and the other part is that I'm am member of a philanthropic Mother's Club here, and their annual craft show/bake sale is this weekend. Club members are required to bake 4 items (and package them prettily as well), and I'd rather bake things I know than take a chance foisting off a new recipe on some unsuspecting patron. So that has left me in a bit of a bind for this week's entry.

After some pondering, I decided to post a helpful tip for working with royal icing. When decorating sugar cookies, you will likely burn through a lot of plastic disposable pastry bags. Sometimes it can be worth it to rinse them out and reuse them, but that can get to be a chore. Several months ago, I came across a brilliant idea on Pinterest to aid in this dilemma. By using this method, you can easily reuse the disposable pastry bags AND have less mess to clean up!

 Here's what you do:

First tear off a decent size piece of plastic wrap and lay it flat on the counter.

Next, plop your desired amount of icing in the middle.


Wrap your icing so that it is sealed in the plastic and then twist the ends.
(I recently figured out it is extra smart to tie off the end you're squeezing from.)


Fold down your icing bag, insert the untied end of the plastic tube into the bag and pull out as much as you can thru the coupler.


Snip off the excess plastic, apply your decorating tip, and screw on the other half of your coupler.


Voila! You have a completely mess free pastry bag full of icing. When you are done decorating, simply remove your tip, carefully extract the plastic tube from the bag (from the wide end), and dispose. That's it!

Thursday, October 11, 2012

Chocolate Oatmeal Bars - by Summer

This recipe was one that I found recently in my dessert binder.  I have had it for quite some time - maybe 8 years - maybe longer. I can't remember why I thought to keep it and because at some point I typed it up, I have no idea where I got this recipe. I think I thought it was something different when I first saved it, but upon reading it thoroughly, I realized that these are pretty similar to the Crack Brownies, but with a a different base. I like the brownies better, but there is something about the combination of milk chocolate chips and peanut butter that is out of this world! I want to try tweaking these in the coming months.  My husband likes the idea of the brownie base, but no crunch (as in crunchy peanut butter or rice krispies). We'll see what I end up with.  Until then, give these a try if you liked the brownies.


Chocolate Oatmeal Bars
2/3 cups butter, softened
1 cup packed brown sugar
1/3 cup corn syrup
1 teaspoon vanilla
4 cups quick-cooking oats
1 package milk chocolate chips
2/3 cup chunky peanut butter
4 Heath candy bars, crushed*

In a mixing bowl, cream the butter and brown sugar. Add corn syrup and vanilla; beat well.  Stir in oats; press into a greased 12x9 inch baking pan.  Bake at 350 for 12-15 minutes or until golden brown.  Cool on a wire rack. 

In a microwave, melt chocolate chips and peanut butter; stir until blended.  Spread over cooled bars.  Sprinkle with crushed candy bars.  Refrigerate until set before cutting.

*I omitted these because I didn't have any on hand.

Tuesday, October 9, 2012

M&M Peanut Butter Bars - by Lisa

I'm always on the lookout for quick and easy yummy recipes. After I saw a friend post these on Pinterest, I knew I had to try them! The best part about this recipe is the super simple ingredient list - 5 items!! That's it!! Even a 4 1/2 year old can make 'em! :D


It's also customizable. Prefer peanut M&Ms? Go for it! How about some Reese's Pieces? Delish! Butterscotch chips? Why not! Maybe try some Nutella instead of peanut butter. You get the idea. :)

I forgot to take more pictures before these were devoured. In, like, a day!

Anywho, here is the recipe slightly adapted. I apologize in advance for expanding your waistline. :)

M&M Peanut Butter Bars
adapted from Rachel Cooks

Ingredients:
3/4 cup peanut butter (I used creamy)
2 large eggs
1 cup packed dark brown sugar
2 cups all-purpose baking mix (Bisquick, for example)
1 bag of M&Ms (Regular M&Ms; ~12 oz bag)

Directions:
1. Preheat oven to 325*F. Spray a 7 x 11 pan with cooking spray.
2. Combine peanut butter and eggs until well mixed and smooth.
3. Add in brown sugar and stir until combined.
4. Stir in baking mix until moistened.
5. Fold in M&Ms. I had to use my hands for this part. And then also had to push in some stray M&Ms.
6. Spread mixture in greased pan and bake for 30-35 minutes or until golden brown.

Thursday, October 4, 2012

Kolacky’s - by Summer

 Today is my dad's birthday! I blame him for my love of all things sweet. But I suppose that isn't really a bad thing. He's a pretty funny guy who enjoys a good joke or a good story. In honor of his birthday I thought I would feature a very tasty cookie - the Kolacky. It's a pastry filled with fruit. I remember helping my mom make these as a child. My mom says they are a lot of work, and while they do have a few steps, I don't think it's anymore work than cut-out cookies - and compared to the decorating that Lisa and I have been doing with Royal Icing, these are quite simple!


The most important step is to pinch them tightly.  It's hard because just when I thought they were were really sealed well, I looked in the oven and they had popped open.  But no worries, open or tightly closed, these little cookies are delicious! I made a half recipe and yielded almost 6 dozen (although, sorry Dad, we won't be bringing that many to you tomorrow!)

Kolacky’s - Recipe from JoAnne Blume

4 sticks butter (soften)
4 (3 oz) pkg cream cheese (soften)
4 Tbs sugar
4 C flour
4 tsp baking powder
4 beaten eggs
2-3 cans of Solo fruit filling (or pie filling - I didn't use the Solo brand)

Cream butter & cream cheese; add sugar & mix. Sift flour with baking powder. Add to mixture and mix well. Add eggs and blend well. Chill. Place on flour dusted board (can also sprinkle a little granulated sugar to help with the sticky dough). Divide dough into fourths. Roll out thin and cut with cookie cutter. Fill with teaspoon (or a little less depending on size of cookie cutter you use) fruit filling. Fold sides together on top and press together. Bake 15-18 min at 400 degrees. Sprinkle w/powder sugar when cool.


Tuesday, September 25, 2012

Brown Eyed Baker's Salted Caramel Chocolate Chip Cookie Bars - by Lisa

Who doesn't love chocolate, caramel and sea salt? Ever since this delightful combo became popular, I've been thoroughly hooked! My eye is always drawn to recipes that feature this mouthwatering confection, and the recipe featured today was a total winner! My friend Kristi posted it to Pinterest, and when I saw it, I knew I immediately had to try it!

I did make this a few months ago, and sadly I didn't take any pictures. And for some foolish reason I haven't made it again since. Shame on me! In any case, I followed the recipe directly from Brown Eyed Baker. The only change I would make in future batches is making these in a 9x13 pan. The 8x8 I used made the cookie bars was just a wee bit too dense.


Salted Caramel Chocolate Chip Cookie Bars

Ingredients:

2 1/8 cups all-purpose flour
½ teaspoon baking soda
½ teaspoon salt
12 tablespoons unsalted butter, melted and cooled to room temperature
1 cup light brown sugar
½ cup granulated sugar
1 egg
1 egg yolk
2 teaspoons vanilla extract
2 cups chocolate chips
10 ounces caramel candy squares, unwrapped
3 tablespoons heavy cream
Fleur de sel (or other sea salt), for sprinkling over caramel and bars

Directions:
1. Preheat oven to 325 degrees F. Grease a 9-inch square pan; set aside.
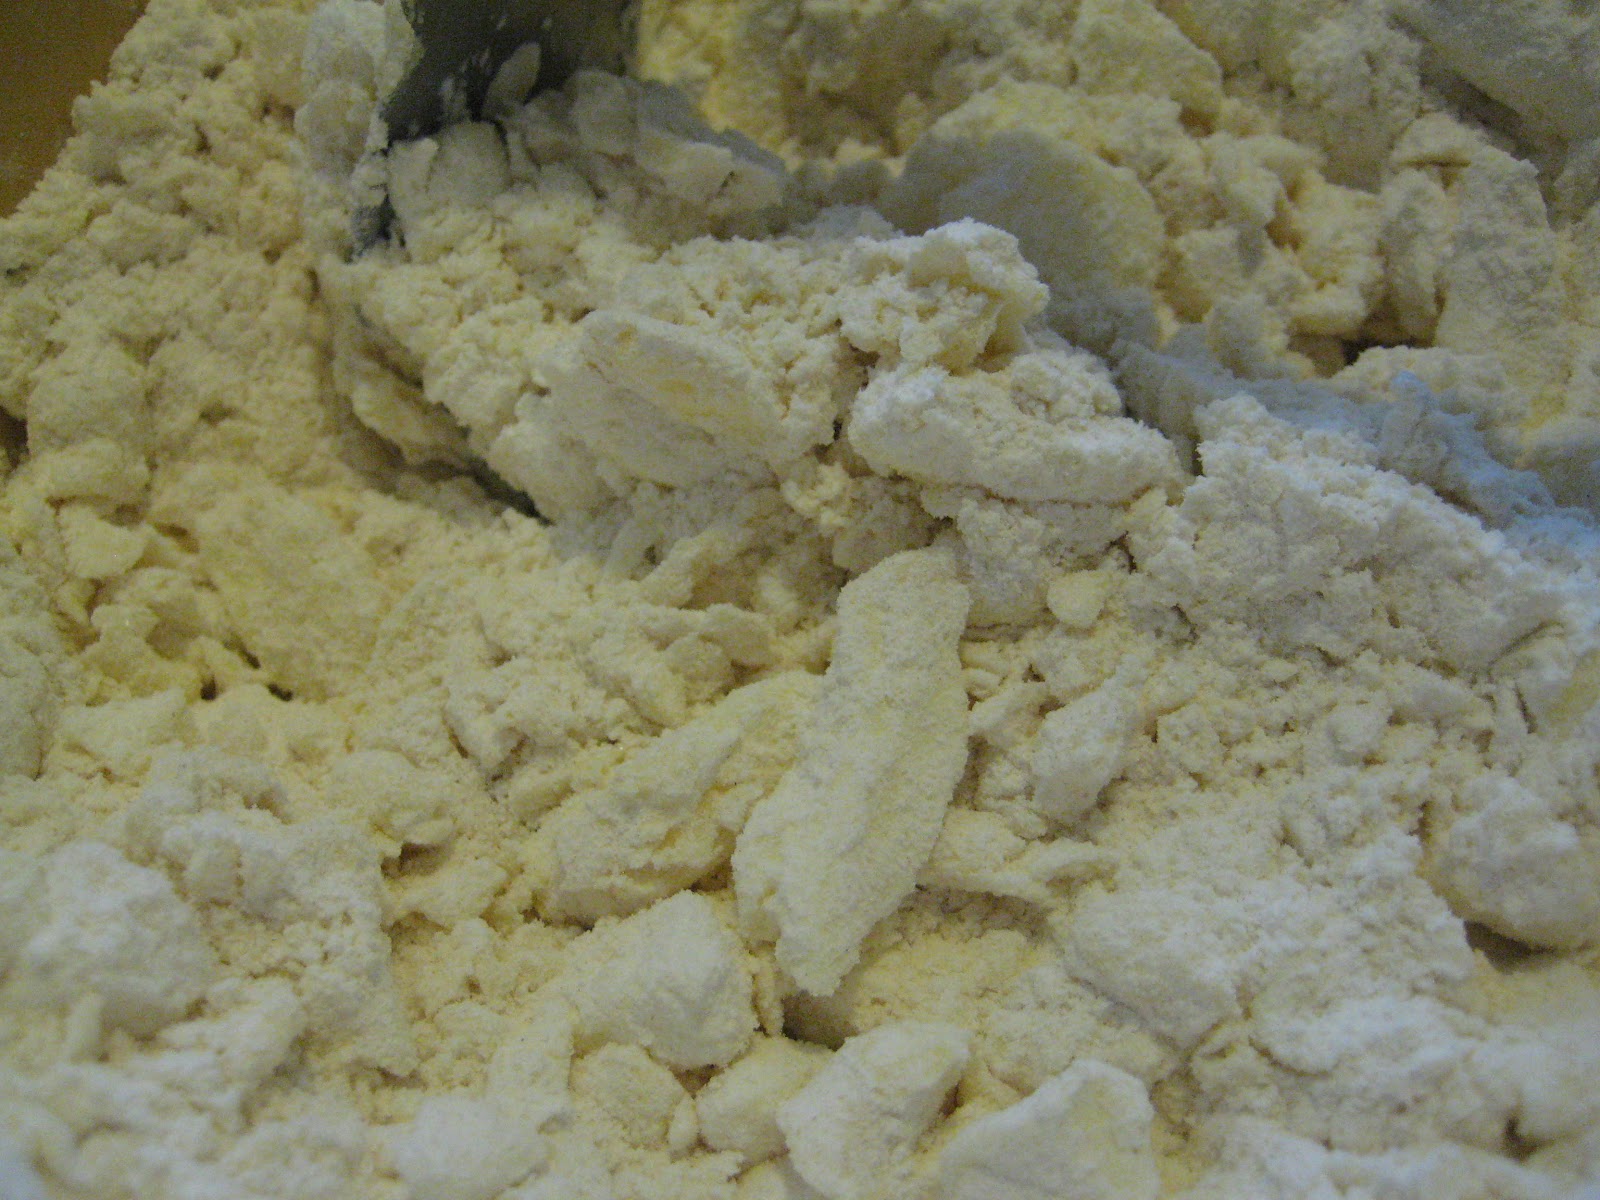
2. In a medium bowl, whisk together the flour, baking soda, and salt; set aside.
3. Using an electric mixer, mix together the melted butter and sugars on medium speed until combined. Add the egg, egg yolk, and vanilla extract and mix until smooth. Slowly add the dry ingredients and mix on low, just until combined. Stir in the chocolate chips.
4. In a medium microwave-safe bowl, combine the caramels and heavy cream. Microwave on high until the caramels are melted, stirring every 20 seconds. This will take about 2 minutes.
5. Press half of the cookie dough into the prepared pan, smoothing the top with a spatula. Pour the hot caramel over the dough cookie dough and spread into an even layer, leaving some empty space around the edges. Sprinkle the caramel with the sea salt. Drop the remaining cookie dough in spoonfuls over the caramel and gently spread the dough with a spatula until the caramel is covered. Sprinkle the bars with additional sea salt.
6. Bake the cookie bars for 30 minutes, or until the top of the bars are light golden brown and the edges start to pull away from the pan. Cool the bars on a wire rack to room temperature, then refrigerate for about 30 minutes to allow the caramel layer to set. Cut into squares and serve. Store leftovers in an airtight container at room temperature.

These are seriously some of the yummiest chocolate chip cookie bars I have ever tasted! What I'd like to try for next is to make these into individual chocolate chip cookies. :)

Thursday, September 20, 2012

Recipe Binders - by Summer

I love Lisa's gadget guide that she has been sharing these past few weeks and I can't wait for more.  I've been baking up a storm lately, but I'll admit this week I haven't been in the kitchen much.  I've decided to share what I've done when I find recipes that I want to try or have tried.  I created binders. I used to have 3, one for main dishes, one for desserts and breakfast and one for side dishes.  I went through and typed up some recipes that were on little sheets or cut out from somewhere.  Then I placed all the recipes in page protectors.  They stayed like that for a long time and then one day at Target they had binders on sale. I bought two bigger ones that matched and now I have main dishes and sides in one binder separated by a tab and then desserts and breakfast stuff still together.


When I first created my binders, I made these nice little cover sheets before each section and I have kept them.


The thing that I like about these new binders is that they have side pockets and an envelope for any loose stuff.  I will admit that right now they are a bit of the mess, but I do try to go through them every couple of years to clean them up.  I usually weed through the recipes and decide if it would really be something that I would ever make - especially since I've had it set aside for 7 years and haven't made it yet!  And sometimes, like recently I found a recipe that I can't believe I haven't made yet (they are these oatmeal chocolate bars and I plan on making them very soon for this blog).

The best part about the binders are the page protectors.  I am a messy baker and cook, and will often spill stuff on recipes or get them wet.  With the protectors you can wipe them off and they stay as good as new.

The binders are also a great place for recipes that I find on the internet.  I usually print them off and stick them in the binder when I am done. I don't have a lot of counter space in the kitchen, so it's a pain to have my laptop in there while baking. Lately I've been getting a ton of recipes online, so I am grateful to have a spot for them.

Tuesday, September 18, 2012

Gadget Guide: Mini Measuring Spoons - by Lisa

I've been pretty busy with the play, home projects and just general day to day stuff and the things I've been baking have actually been from the cookbook we baked our way through! Since I don't have any other fun recipes to report at the moment, I thought I'd add another gadget guide entry.

Ever come across a recipe that calls for a dash or a pinch or a smidgen of an ingredient (usually a spice)? Did you know there are actually real measurements tied to those amounts? There are! Yes, we bakers can be maybe a little too precise sometimes. :) Normally I just guesstimate those amounts, but every once in awhile I pull out these cute little spoons I got ages ago as a little bonus gift. I've seen similar ones in stores from time to time as well. Some of those even include "hint" and "tad." LOL!

Sorry for the crummy phone photo


But in case you were wondering, those actual measurements are as follows (source: Wikipedia):
Dash: 1/8 tsp
Pinch: 1/16 tsp
Smidgen: 1/32 tsp

So there you have it! Learn something new everyday, right? ;)

Thursday, September 13, 2012

Mini Pumpkin Muffins - By Summer


I love baking in the fall and I especially love baking with pumpkin. I was hosting some moms and their kids at  our house yesterday for a playdate. I knew we were finally going to have some cooler weather (this week we were up in the 90's again). I was excited to try some pumpkins muffins. I was thinking mini muffins would be easy for the kids to handle and what goes better with pumpkin than chocolate?  I added some mini chocolate chips to the recipe and yum!

Mini Pumpkin Muffins adapted from Cooking with My Kid


Ingredients:
1 1/2 cups flour
3/4 cup sugar
1 teaspoons baking powder
1 teaspoon baking soda
pinch of salt
1 teaspoon pumpkin pie spice
1 can 100% pure pumpkin
2 large eggs lightly beaten
1/2 cup canola oil or vegetable oil
1/3 cup applesauce
1/2 cup mini chocolate chips (optional)

Preheat oven to 400 degrees. Spray mini muffin tins with cooking spray. Mix flours, sugar, baking powder, baking soda, pumpkin pie spice and salt in large bowl. In a separate bowl whisk together pumpkin, eggs, oil, and yogurt. Combine wet and dry ingredients until just blended. Stir in mini chocolates.  Spoon batter into muffin tins. Bake for 8 to 10 minutes or until toothpick comes out clean.  Transfer muffins to rack to cool.  Makes 48 mini muffins.

Just a couple of notes - the original recipe called for 30-35 muffins and I got 48 minis and 3 regular size ones.  I also used little paper cups instead of spraying the pan.


Tuesday, September 11, 2012

Gadget Guide: Oven Thermometer - by Lisa

I love baking/cooking/kitchen gadgets. So much so that I am often teased by my sisters for having so many of them! It's been a challenge in my past couple of residences to store all of them, but what can I say? I'm a sucker for a good gadget. :)

I thought it would be fun to highlight some of the gadgets I love or use most frequently in a series of posts over the next several months. I'll post about them once or twice a month under the header "Gadget Guide."

The first one that came to mind is my oven thermometer. I never had much use for one until I moved into our rental we lived in during our last year in WA. I was having the worst time baking my go-to recipe, chocolate chip cookies! I used to always bake them on a baking stone and they always came out great. Suddenly, in the new oven they were browning on the top, but not at all baking on the bottom and the chips barely even melted! I was in a panic. First I thought something was wrong with the stone, so I tried a new pan. No luck. Then I checked my baking soda. It wasn't that either. I methodically checked my steps and nothing I was doing changed. Finally I decided to check the oven temps.

I went to the store and bought one of those oven thermometers. I recalled my MIL having used one in her oven because it wasn't always heating reliably. They are easy to find in your local grocery store or big box store and can be purchased for as little as $5. I decided to place it in the center of the oven since that is where my trays and pans usually sit. Next, I turned the oven on to 375 and checked the temp when the "pre-heat" ding went off about 10 minutes later. Wait, what?! 250 degrees?! No wonder my cookies were turning out so miserably! I quickly learned that letting it pre-heat for about 20 minutes finally got it set to the correct temperature.


Fast forward two years to our new home in IL. After baking a couple recipes from our baking project, I'd noticed things weren't coming out quite right; like the meringues coming out a little burned among other things. I once again turned to my trusty oven thermometer and discovered my (ancient) oven was running 50-75 degrees hot! Ah ha! So now I have to remember to set my temps to about 300-325 when making my cookies that technically need to be set to 375.

So you can probably see why I am such a fan of the oven thermometer. It has recused my baking endeavors more than once! If you have an old oven or find things just aren't turning out quite right, maybe give the old thermometer a whirl. You might learn something new about your oven!

Thursday, September 6, 2012

Stencil Technique - by Lisa

The holiday weekend completely threw me off, and I'm also in the final week of rehearsals for my play. Sorry for the late post!

My brother passed away this summer, and at his memorial service we had a sweets table in the reception room. My sisters and I all got together and baked up a storm. I decided to make frosted sugar cookies with his monogram on them.

I made a simple sugar cookie with white royal icing. Originally I was going to pipe on his initials, but then I realized there was no way I could do it neatly and consistently for all the cookies. So I started looking for new ideas and came up with the plan to make a stencil.

I also recently became the owner of a Silhouette Cameo. It is a machine that cuts out any shape you want on a variety of materials. I had some issues with finding the right material to cut (yeah, stencil paper is way to thick for this machine), and finally figured out a suitable solution. The next hurdle was figuring out what medium to use. Royal icing? Spray icing? Gel food writer from a tube? Finally after some trial and error, I settled on food coloring pens which worked out beautifully!


Summer came out for the service, and she was a huge help in stenciling in the cookies. We were both quite pleased with the final result!


In the future, I will try and find some more lightweight material for the stencil. I've heard the dividers in notebooks work really well. It needs to be a firm material, and something that can be periodically wiped clean without falling apart. (My temporary solution was heavy card stock with freezer paper adhered to it.)

I look forward to trying this technique again (and under cheerier circumstances) with other cookies that would require a precise design such as a logo or something similar!

Keeping Things Figure Friendly

 When we first started this blog, eating all of the yummy treats didn't bother me - for about the first two years.  I was busy having babies and you need the extra calories . . . so I didn't worry about gaining weight.  But there definitely came a time when I  knew I had to slow down.  People often wanted to know how I kept from gaining lots of unwanted weight while doing this project.

The simple answer is actually planning.  I often planned to make desserts when we would have family or friends over for dinner.  Or if I had book club.  Or I would send things to my husband's work (I was really popular there!) Or I would give stuff the neighbors.  Surprisingly, we rarely had to devour anything all on our own, although there were times that we wished we didn't have to share!

Now that I don't have to bake as often, it's been somewhat of a relief on my waistline.  I'm not really a fan of baking "low-cal", "low fat", "healthy" things.  I'm somewhat of a purist - I like my butter and sugar.  It doesn't mean that the healthier versions aren't good, but I just don't always think they taste quite the same.  I would rather have a little bit of something that is full fat than a lot of something that doesn't taste great.  My other issue is that often times those recipes call for things that I don't tend to keep on hand.  Usually when I am in the mood to bake, I want to do it right then!  And running to the grocery store with two small children is never just a quick trip. So I often need to use what I have around.

I was excited when I stumbled across these cookies.  They aren't that bad for you, and you don't have to buy anything special for these either!  Try them - I think you'll be surprised how yummy they are!

Chocolate Chocolate Chip Cookies - recipe from Weight Watchers

  1 cup(s) all-purpose flour   
  1/4 tsp baking soda   
  1/8 tsp table salt   
  1/4 cup(s) salted butter, softened   
  1/2 cup(s) dark brown sugar, packed   
  1/2 cup(s) sugar, granulated   
  1/3 cup(s) unsweetened cocoa   
  2 large egg white(s)   
  1/3 cup(s) semi-sweet chocolate chips, miniature   

Preheat oven to 350°F.

Lightly spoon flour into a dry measuring cup; level with a knife. Combine flour, baking soda and salt in a large bowl.

Beat butter and brown sugar with a mixer at medium speed until light and fluffy; gradually add granulated sugar, beating well. Add cocoa and egg whites, beating well. Gradually add flour mixture, beating until blended. Stir in chocolate minichips.

Drop by rounded teaspoonfuls 11⁄2 inches apart onto baking sheets lined with parchment paper. Bake at 350°F for 10 minutes. Cool on pans 2 minutes or until firm. Remove cookies from pans; cool completely on wire racks. Yield: 40 cookies (serving size: 1 cookie).

Thursday, August 30, 2012

Saving Bananas by Summer


For the first three years of our marriage I made a lot of banana bread. And I mean, a lot! The primary reason was that every week while grocery shopping, we would buy a bunch of bananas for the week.  My husband usually took a banana to work a day to eat with his breakfast, but somehow most weeks we had at least a banana or two leftover - sometimes more. Of course after awhile, I didn't always feel like making banana bread every month or every other week.

A friend of mine happened to mentioned that she puts her over-ripe bananas in the freezer.  I tried it and was amazed!  Even though they turn dark brown/black all over, and are super mushy when thawed, they taste the very same after baking with them!  This was an amazing discovery for me!  I usually use up any bananas that I have stored in the freezer within 6 months. The only thing to remember is thawing time. Usually I'll stick them in a bowl in the fridge overnight. Since we have had kids, my banana supply in the freezer is down to nothing (we usually finish up all of our bananas long before the week is over!)

Here is my go to banana bread recipe that I have used since I was first married.  It's easy and quick and most importantly, tasty!

Banana Bread from Better Homes and Gardens
1 3/4 cups flour
2/3 cup sugar
2 teaspoons baking powder
1/2 teaspoon baking soda
1/4 teaspoon salt
1 cup mashed ripe bananas (I use 3-4 bananas)
1/3 cup shortening, margarine or butter (I always use butter)
2 tablespoons milk
2 eggs
1/4 chopped nuts (optional - I almost always leave these out)

In a large mixing bowl combine 1 cup of the flour, the sugar, baking powder, baking soda and salt. Add mashed banana, butter and milk. Beat with an electric mixer on low speed until blended, then on high speed for 2 minutes. Add eggs and remaining flour; beat till blended. Stir in nuts.

Pour batter into greased loaf pan.  Bake in a 350 degree oven for 55-60 minutes or until a toothpick inserted near the center comes out clean.  Cool for 10 minutes on a wire rack. Remove from pan; cool thoroughly on wire rack. Wrap and store overnight before slicing.

Additional notes:

  • I have started using a combination of flour and whole wheat flour.  I usually do 1 cup flour and 3/4 cups whole wheat flour.
  • This can be stored in the freezer.  I usually wrap in foil and then stick in a zip lock bag.

Wednesday, August 29, 2012

Cornbread from Scratch - by Lisa

I meant to get this post up yesterday, but I got a little distracted. Sorry! :)

Once upon a time, I was not a fan of chili. Consequently, I never quite understood the allure of cornbread. However, in recent years, I've discovered I do actually like chili, and a lovely piece of cornbread smothered in honey is quite enjoyable! I've made a few different types of cornbread ranging from boxed variations (Jiffy & Marie Callender (the latter was far superior) to recipes from scratch.

I came across another scratch recipe to try from a book I bought received from my dear nephew for Christmas last year called Make The Bread, Buy The Butter by Jennifer Reese. (LOVE IT!) The author set out to compare what is better made from scratch versus bought at the store. There are lots of recipes I am excited to try from it which I am sure will also make their way to this blog! :)

So I tried her recipe for the cornbread (which was actually passed down to her from her husband's grandmother), and it was a hit! Sweet enough for my liking and a great crumb. I adapted it slightly in that I used a 7x11 pan instead of a 10 inch pie pan.


Here is the recipe (adapted slightly from Make the Bread, Buy the Butter)

Ingredients:
6 Tbsp unsalted butter
1 cup all-purpose flour
1 cup yellow cornmeal
1/2 sugar
4 tsp baking powder
1 tsp kosher salt
2 large eggs
1 cup milk

Directions:
1. Preheat the oven to 375 degrees F. Put the butter in a 7x11 glass pan and place in the oven to melt.
2. Mix the flour, cornmeal, sugar, baking powder, and salt in a large bowl. In a separate bowl, whisk together the eggs and milk. Once the butter has melted, take the pan out of the oven and swirl the butter around to coat the glass. Let it cool just a bit and then pour the remainder into the egg mixture. Whisk it all together.
3. Whisk the egg mixture into the dry mixture. It doesn't have to be completely incorporated. A couple of lumps are fine.
4. Pour into the glass pan and bake for about 25 minutes or until a tooth pick inserted in the middle comes out clean.

Thursday, August 23, 2012

Apricot Bars - by Summer


I recently ran into my former choir teacher from grade school.  She made these amazing bars which my whole family loved. She made some other cookies which may be featured at another date.  My mom got the recipe from her and even though I had been told they were easy, I never realized just how easy these are!  My two-year old helped with these. He's getting pretty good with a pastry blender already!  I changed the recipe slightly as I made these with all butter (I mean, really, how can you go wrong with butter?!)

Making the crust - flour, sugar, butter

Pat it into the pan

While crust is baking, soften preserves and make topping

Spread preserves on hot crust, then sprinkle topping (not shown)

Baked bars

Add frosting while still warm - then enjoy!

Try them! I bet you won't stop eating them!

Apricot Bars adapted from Mrs. Terrell

Crust
2 Cups Flour
1/2 Cup Granulated Sugar
1/2 Teaspoon Salt
1 Cup Softened butter
Mix together dry ingredients, then cut in oleo with a pastry blender until crumbly. Press into bottom of 10 x 15 jelly roll pan.
Bake for 10 minutes at 350 degrees.

Filling
1 Jar (18-20 oz.) Apricot Preserves
Empty preserves into a bowl. Stir to soften preserves. Spread over baked crust while hot.

Topping
3/4 Cup Flour
1/4 Cup Brown Sugar
1/4 Cup Granulated Sugar
1/2 Cup butter
Mix together until crumbly, sprinkle over preserves. Bake @ 350 for 30 minutes.

Frosting
1 Cup Powered Sugar
1 Tablespoon Milk
Mix together til smooth. Drizzle over top of warm bars. Cut into squares while warm.

Feed to Father*.

*I had to email my dad for the recipe. This line was included and he wouldn't lie to me . . .

Tuesday, August 21, 2012

Crack Brownies - by Lisa

I already have one addictive recipe - Crack Dip. Now I can add another to the category - Crack Brownies. My niece made these, and once I tried them, I instantly HAD to have the recipe! She made some tweaks to the original recipe, and I also made some tweaks. These are super simple to make, and I can practically guarantee, you'll want to keep them all for yourself. :)


Crack Brownies adapted from How Sweet It Is
  • 1 batch brownies (I used Duncan Hines fudgey brownies, or you can do your own)
  • 1 1/2 cup chopped Reese’s peanut butter cups
  • 1 1/2 cup milk chocolate chips
  • 2 cup creamy peanut butter
  • 2 1/2 cups Rice Krispies Cereal
Mix brownies according to directions, and bake for 20-25 minutes in a 9 x 13 baking dish. 
Remove and top with peanut butter cups, and bake for 4-6 minutes more.
While they are finishing baking, melt chocolate chips and peanut butter. Stir in cereal. 
Remove brownies from oven and evenly pour Rice Krispie mixture over top.
Refrigerate for 2 hours before serving.

Thursday, August 16, 2012

Pie Crust - by Summer

I know that many people have a fear of making pie crust. I was fortunate to have my mother-in-law teach me how to make her recipe when I was first married. It took some practice. I remember making it by myself for the first time and it turned out so tough that I couldn't roll it out!  I literally threw it away and started over. But as time went by, I figured it out.

Then as a present for my 30th birthday, I was signed up for a class in pie-making (thanks to Lisa!)  It was a lot of fun and I learned a ton in 3 hours!  I also came away with a new pie-crust recipe.  I have a couple of other ones that I pull out from time to time, but the one from the class is my main, go-to one.  One of the biggest reasons is that it makes a lot, and I always have leftovers, which is way better than barely having enough to crimp the edge of the crust.

Since this is something that I don't fear, I thought I would share the recipe and some tips.  Just try it.  Homemade pie crust is so much better than store bought!  And if you ask my dad, he'll tell you that with pies - it's all about the crust!!!

Let's begin!  First you start with flour, a little bit of sugar and salt. Mix them together with a fork.
That's my little guy's job
Next you add the butter and shortening cut up in smaller pieces.
I like to use butter-flavor shortening.
Use your pastry blended (or two knives I guess work too) and mix up the butter and shortening with the flour mixture.

When you have pea-size pieces, then you can add the cold water.  I start slowly and then use the tips of my fingers to mix it together into a dough.

Don't over-mix at this point or the dough will become tough.  The dough should hold together without being sticky or crumbly. There have been times when I have added slightly more water at this point, but be very careful.  This dough won't be overly smooth - which is good. Once it's fairly together, I divide it into two pieces - try to get them as equal as possible, but I never bother getting a scale out or anything - I just eye-ball it.  Then wrap in plastic wrap and put into the fridge for at least 30 minutes.  You can leave in the fridge for a few days.

I like using a Silpat when rolling out pie dough.  First generously flour the surface and your rolling pin.  I learned to turn the silpat after each roll to get a nice circle shape (sometimes it works better than others.) When the dough is rolled out enough, I fold it in fourths and then place it into the pie plate.


 Once you have it in the pie plate, you can trim the edges. I've seen some people cut it with scissors, but usually just tear it off with my hands.
Next you can add your filling.  If you are going to prepare your filling, I recommend sticking the pie plate into the fridge.  For fruit pie fillings it is recommended to add butter on top.  This is to create a fill on top of the fruit filling.
For this particular fruit pie, I like to make a lattice topping. I've seen and heard different ways about doing this, like weaving the lattice and freezing it, but I haven't had the great luck with that.  What I have found is that even if the lattice isn't super even or if it breaks while weaving (which it did for me this time), it doesn't really matter. People are usually impressed that you took the time to do it! And once it bakes, it usually is fine.  If you do not use a lattice crust, you'll need to remember to cut some slits on the tops crust of the pie.

All that's left is seal the edges by dipping your finger in water and place it on the other side of the lattice on the edge and press together.  I am the worst at fluting the edges of a pie.  Sometimes I just use a fork, but I was rushed today and just used my finger.  Then you bake it and you end up with this:
The fruit filling bubbled over a little to the top, but that's ok!  This pie is great served with ice cream or whipping cream, but we just ate it plain and it was super yummy just the same!

I really encourage everyone to try making pie crust from scratch.  There are a ton of different recipes out there to choose, but they are all very similar.

Razzle Dazzle Berry Pie from John Michael Lerma
Crust:
3 cups all purpose flour
1 tablespoon sugar
1 teaspoon kosher or Hawaiian salt (I just use regular)
1/2 cup cold shortening, cut into small pieces
1/2 cup cold unsalted butter, cut into small pieces
1/2 cold water

  1. All ingredients should be cold. Combine all the dry ingredients in a large mixing bowl. Add shortening and butter. Using a pastry blender, cut in shortening and butter until the mixture resembles course meal.
  2. Drop by drop, add the cold water. Mix in with the finger tips not hands as the palms will warm the dough. Continue mixing water until the dough begins to hold together without being sticky but not crumbly.
  3. Divide dough into two pieces and place each in plastic wrap. Fold over plastic wrap and press down to form a disk. This will make rolling out easier after chilling. Place in fridge for at least an hour.
  4. Lightly spray a 9-inch pie plate with cooking spray. Roll out dough and place in pie plate. Return to fridge until filling is ready. Roll out top crust or use a pastry cutter to cut strips for a lattice crust.
Filling:
1 cup sugar
Dash of salt
1/4 cup cornstarch
1/2 teaspoon of ground cinnamon
1 cup blueberries
1 1/2 cup strawberries
1 cup blackberries
1 cup red raspberries
1/2 cup water
2 tablespoons freshly squeezed lemon juice, about 1/2 a large lemon
2 tablespoons unsalted butter

Note - You can use a different combination of berries - I omitted the blackberries and added more raspberries this time because that is what I had on hand. 
  1. In a heavy bottom saucepan, combine sugar, salt, cornstarch, and cinnamon. Stir in berries. Add water and lemon juice. Cook over medium heat just to the boiling point. Stir filling gently to shift the mixture to prevent scorching.
  2. Pour into chilled pie shell. Dot with butter and top with crust. You can apply egg wash and sprinkle with vanilla sugar. Bake at 350 for about 45 minutes or until the crust is golden.
There are some good tips about pie making here.