Background

Thursday, August 30, 2012

Saving Bananas by Summer


For the first three years of our marriage I made a lot of banana bread. And I mean, a lot! The primary reason was that every week while grocery shopping, we would buy a bunch of bananas for the week.  My husband usually took a banana to work a day to eat with his breakfast, but somehow most weeks we had at least a banana or two leftover - sometimes more. Of course after awhile, I didn't always feel like making banana bread every month or every other week.

A friend of mine happened to mentioned that she puts her over-ripe bananas in the freezer.  I tried it and was amazed!  Even though they turn dark brown/black all over, and are super mushy when thawed, they taste the very same after baking with them!  This was an amazing discovery for me!  I usually use up any bananas that I have stored in the freezer within 6 months. The only thing to remember is thawing time. Usually I'll stick them in a bowl in the fridge overnight. Since we have had kids, my banana supply in the freezer is down to nothing (we usually finish up all of our bananas long before the week is over!)

Here is my go to banana bread recipe that I have used since I was first married.  It's easy and quick and most importantly, tasty!

Banana Bread from Better Homes and Gardens
1 3/4 cups flour
2/3 cup sugar
2 teaspoons baking powder
1/2 teaspoon baking soda
1/4 teaspoon salt
1 cup mashed ripe bananas (I use 3-4 bananas)
1/3 cup shortening, margarine or butter (I always use butter)
2 tablespoons milk
2 eggs
1/4 chopped nuts (optional - I almost always leave these out)

In a large mixing bowl combine 1 cup of the flour, the sugar, baking powder, baking soda and salt. Add mashed banana, butter and milk. Beat with an electric mixer on low speed until blended, then on high speed for 2 minutes. Add eggs and remaining flour; beat till blended. Stir in nuts.

Pour batter into greased loaf pan.  Bake in a 350 degree oven for 55-60 minutes or until a toothpick inserted near the center comes out clean.  Cool for 10 minutes on a wire rack. Remove from pan; cool thoroughly on wire rack. Wrap and store overnight before slicing.

Additional notes:

  • I have started using a combination of flour and whole wheat flour.  I usually do 1 cup flour and 3/4 cups whole wheat flour.
  • This can be stored in the freezer.  I usually wrap in foil and then stick in a zip lock bag.

Wednesday, August 29, 2012

Cornbread from Scratch - by Lisa

I meant to get this post up yesterday, but I got a little distracted. Sorry! :)

Once upon a time, I was not a fan of chili. Consequently, I never quite understood the allure of cornbread. However, in recent years, I've discovered I do actually like chili, and a lovely piece of cornbread smothered in honey is quite enjoyable! I've made a few different types of cornbread ranging from boxed variations (Jiffy & Marie Callender (the latter was far superior) to recipes from scratch.

I came across another scratch recipe to try from a book I bought received from my dear nephew for Christmas last year called Make The Bread, Buy The Butter by Jennifer Reese. (LOVE IT!) The author set out to compare what is better made from scratch versus bought at the store. There are lots of recipes I am excited to try from it which I am sure will also make their way to this blog! :)

So I tried her recipe for the cornbread (which was actually passed down to her from her husband's grandmother), and it was a hit! Sweet enough for my liking and a great crumb. I adapted it slightly in that I used a 7x11 pan instead of a 10 inch pie pan.


Here is the recipe (adapted slightly from Make the Bread, Buy the Butter)

Ingredients:
6 Tbsp unsalted butter
1 cup all-purpose flour
1 cup yellow cornmeal
1/2 sugar
4 tsp baking powder
1 tsp kosher salt
2 large eggs
1 cup milk

Directions:
1. Preheat the oven to 375 degrees F. Put the butter in a 7x11 glass pan and place in the oven to melt.
2. Mix the flour, cornmeal, sugar, baking powder, and salt in a large bowl. In a separate bowl, whisk together the eggs and milk. Once the butter has melted, take the pan out of the oven and swirl the butter around to coat the glass. Let it cool just a bit and then pour the remainder into the egg mixture. Whisk it all together.
3. Whisk the egg mixture into the dry mixture. It doesn't have to be completely incorporated. A couple of lumps are fine.
4. Pour into the glass pan and bake for about 25 minutes or until a tooth pick inserted in the middle comes out clean.

Thursday, August 23, 2012

Apricot Bars - by Summer


I recently ran into my former choir teacher from grade school.  She made these amazing bars which my whole family loved. She made some other cookies which may be featured at another date.  My mom got the recipe from her and even though I had been told they were easy, I never realized just how easy these are!  My two-year old helped with these. He's getting pretty good with a pastry blender already!  I changed the recipe slightly as I made these with all butter (I mean, really, how can you go wrong with butter?!)

Making the crust - flour, sugar, butter

Pat it into the pan

While crust is baking, soften preserves and make topping

Spread preserves on hot crust, then sprinkle topping (not shown)

Baked bars

Add frosting while still warm - then enjoy!

Try them! I bet you won't stop eating them!

Apricot Bars adapted from Mrs. Terrell

Crust
2 Cups Flour
1/2 Cup Granulated Sugar
1/2 Teaspoon Salt
1 Cup Softened butter
Mix together dry ingredients, then cut in oleo with a pastry blender until crumbly. Press into bottom of 10 x 15 jelly roll pan.
Bake for 10 minutes at 350 degrees.

Filling
1 Jar (18-20 oz.) Apricot Preserves
Empty preserves into a bowl. Stir to soften preserves. Spread over baked crust while hot.

Topping
3/4 Cup Flour
1/4 Cup Brown Sugar
1/4 Cup Granulated Sugar
1/2 Cup butter
Mix together until crumbly, sprinkle over preserves. Bake @ 350 for 30 minutes.

Frosting
1 Cup Powered Sugar
1 Tablespoon Milk
Mix together til smooth. Drizzle over top of warm bars. Cut into squares while warm.

Feed to Father*.

*I had to email my dad for the recipe. This line was included and he wouldn't lie to me . . .

Tuesday, August 21, 2012

Crack Brownies - by Lisa

I already have one addictive recipe - Crack Dip. Now I can add another to the category - Crack Brownies. My niece made these, and once I tried them, I instantly HAD to have the recipe! She made some tweaks to the original recipe, and I also made some tweaks. These are super simple to make, and I can practically guarantee, you'll want to keep them all for yourself. :)


Crack Brownies adapted from How Sweet It Is
  • 1 batch brownies (I used Duncan Hines fudgey brownies, or you can do your own)
  • 1 1/2 cup chopped Reese’s peanut butter cups
  • 1 1/2 cup milk chocolate chips
  • 2 cup creamy peanut butter
  • 2 1/2 cups Rice Krispies Cereal
Mix brownies according to directions, and bake for 20-25 minutes in a 9 x 13 baking dish. 
Remove and top with peanut butter cups, and bake for 4-6 minutes more.
While they are finishing baking, melt chocolate chips and peanut butter. Stir in cereal. 
Remove brownies from oven and evenly pour Rice Krispie mixture over top.
Refrigerate for 2 hours before serving.

Thursday, August 16, 2012

Pie Crust - by Summer

I know that many people have a fear of making pie crust. I was fortunate to have my mother-in-law teach me how to make her recipe when I was first married. It took some practice. I remember making it by myself for the first time and it turned out so tough that I couldn't roll it out!  I literally threw it away and started over. But as time went by, I figured it out.

Then as a present for my 30th birthday, I was signed up for a class in pie-making (thanks to Lisa!)  It was a lot of fun and I learned a ton in 3 hours!  I also came away with a new pie-crust recipe.  I have a couple of other ones that I pull out from time to time, but the one from the class is my main, go-to one.  One of the biggest reasons is that it makes a lot, and I always have leftovers, which is way better than barely having enough to crimp the edge of the crust.

Since this is something that I don't fear, I thought I would share the recipe and some tips.  Just try it.  Homemade pie crust is so much better than store bought!  And if you ask my dad, he'll tell you that with pies - it's all about the crust!!!

Let's begin!  First you start with flour, a little bit of sugar and salt. Mix them together with a fork.
That's my little guy's job
Next you add the butter and shortening cut up in smaller pieces.
I like to use butter-flavor shortening.
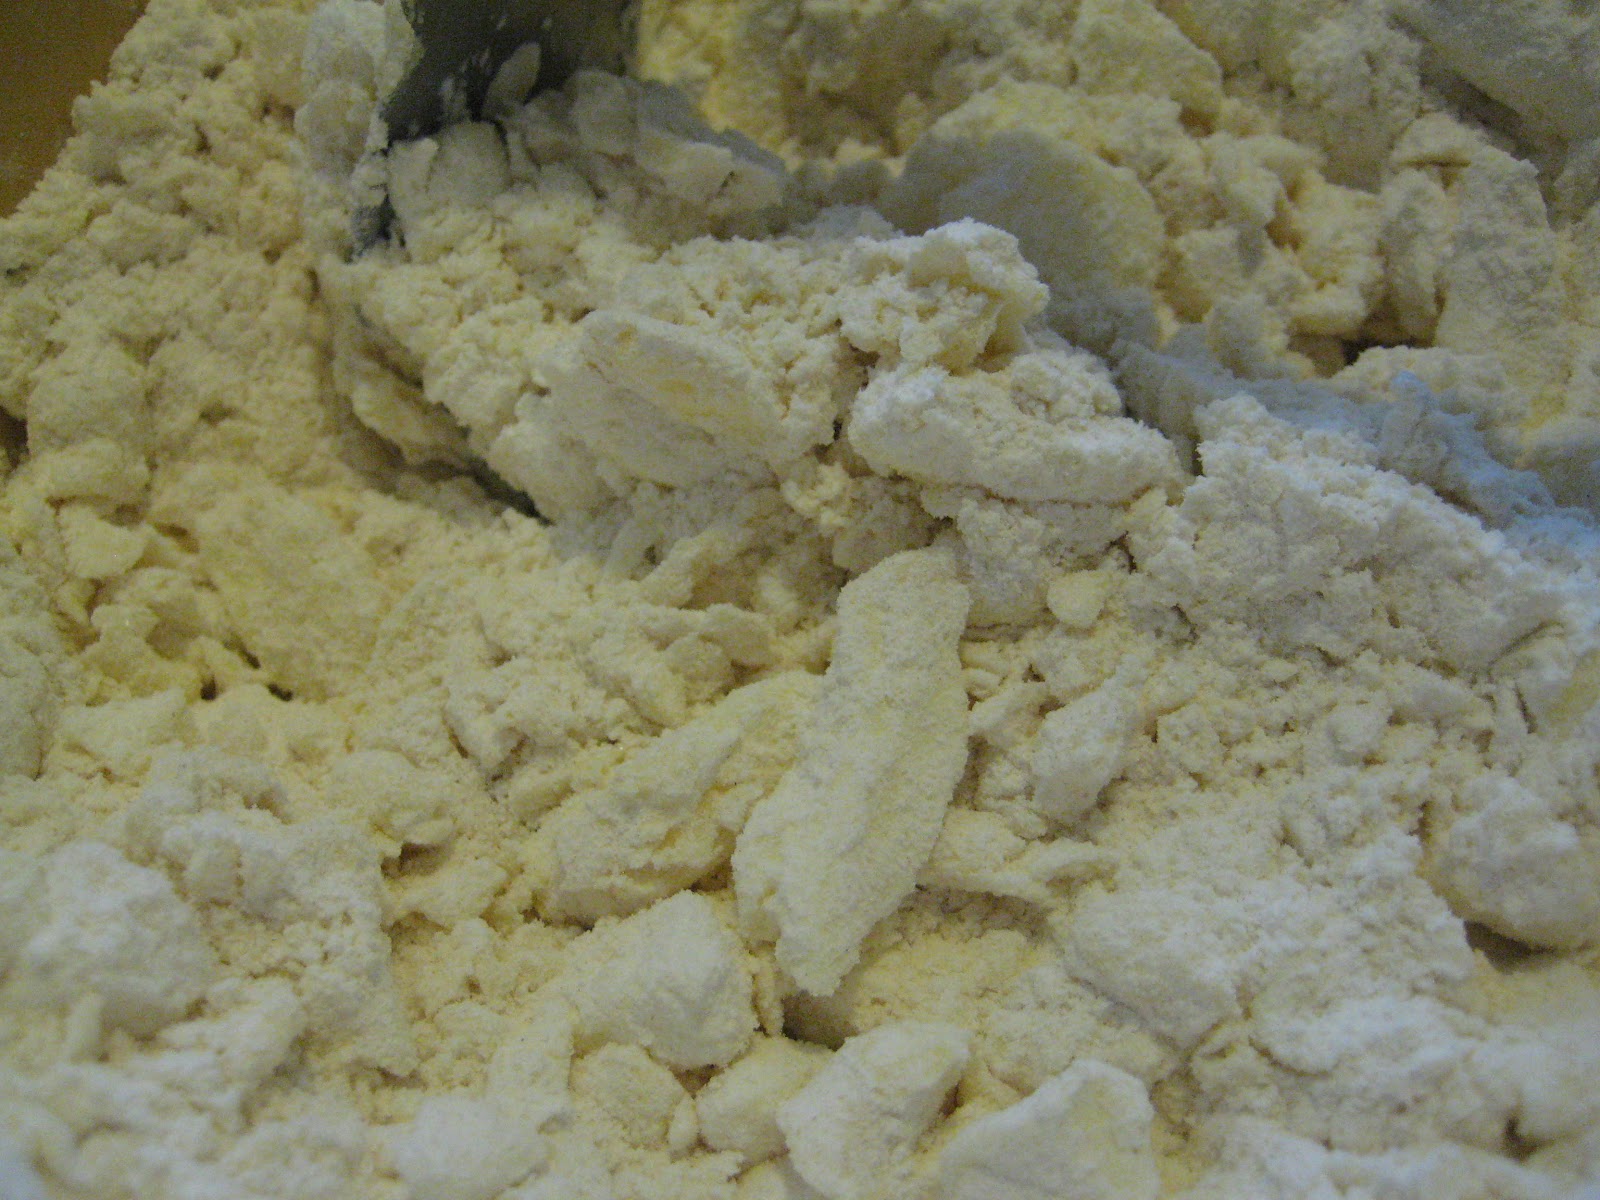
Use your pastry blended (or two knives I guess work too) and mix up the butter and shortening with the flour mixture.

When you have pea-size pieces, then you can add the cold water.  I start slowly and then use the tips of my fingers to mix it together into a dough.

Don't over-mix at this point or the dough will become tough.  The dough should hold together without being sticky or crumbly. There have been times when I have added slightly more water at this point, but be very careful.  This dough won't be overly smooth - which is good. Once it's fairly together, I divide it into two pieces - try to get them as equal as possible, but I never bother getting a scale out or anything - I just eye-ball it.  Then wrap in plastic wrap and put into the fridge for at least 30 minutes.  You can leave in the fridge for a few days.

I like using a Silpat when rolling out pie dough.  First generously flour the surface and your rolling pin.  I learned to turn the silpat after each roll to get a nice circle shape (sometimes it works better than others.) When the dough is rolled out enough, I fold it in fourths and then place it into the pie plate.


 Once you have it in the pie plate, you can trim the edges. I've seen some people cut it with scissors, but usually just tear it off with my hands.
Next you can add your filling.  If you are going to prepare your filling, I recommend sticking the pie plate into the fridge.  For fruit pie fillings it is recommended to add butter on top.  This is to create a fill on top of the fruit filling.
For this particular fruit pie, I like to make a lattice topping. I've seen and heard different ways about doing this, like weaving the lattice and freezing it, but I haven't had the great luck with that.  What I have found is that even if the lattice isn't super even or if it breaks while weaving (which it did for me this time), it doesn't really matter. People are usually impressed that you took the time to do it! And once it bakes, it usually is fine.  If you do not use a lattice crust, you'll need to remember to cut some slits on the tops crust of the pie.

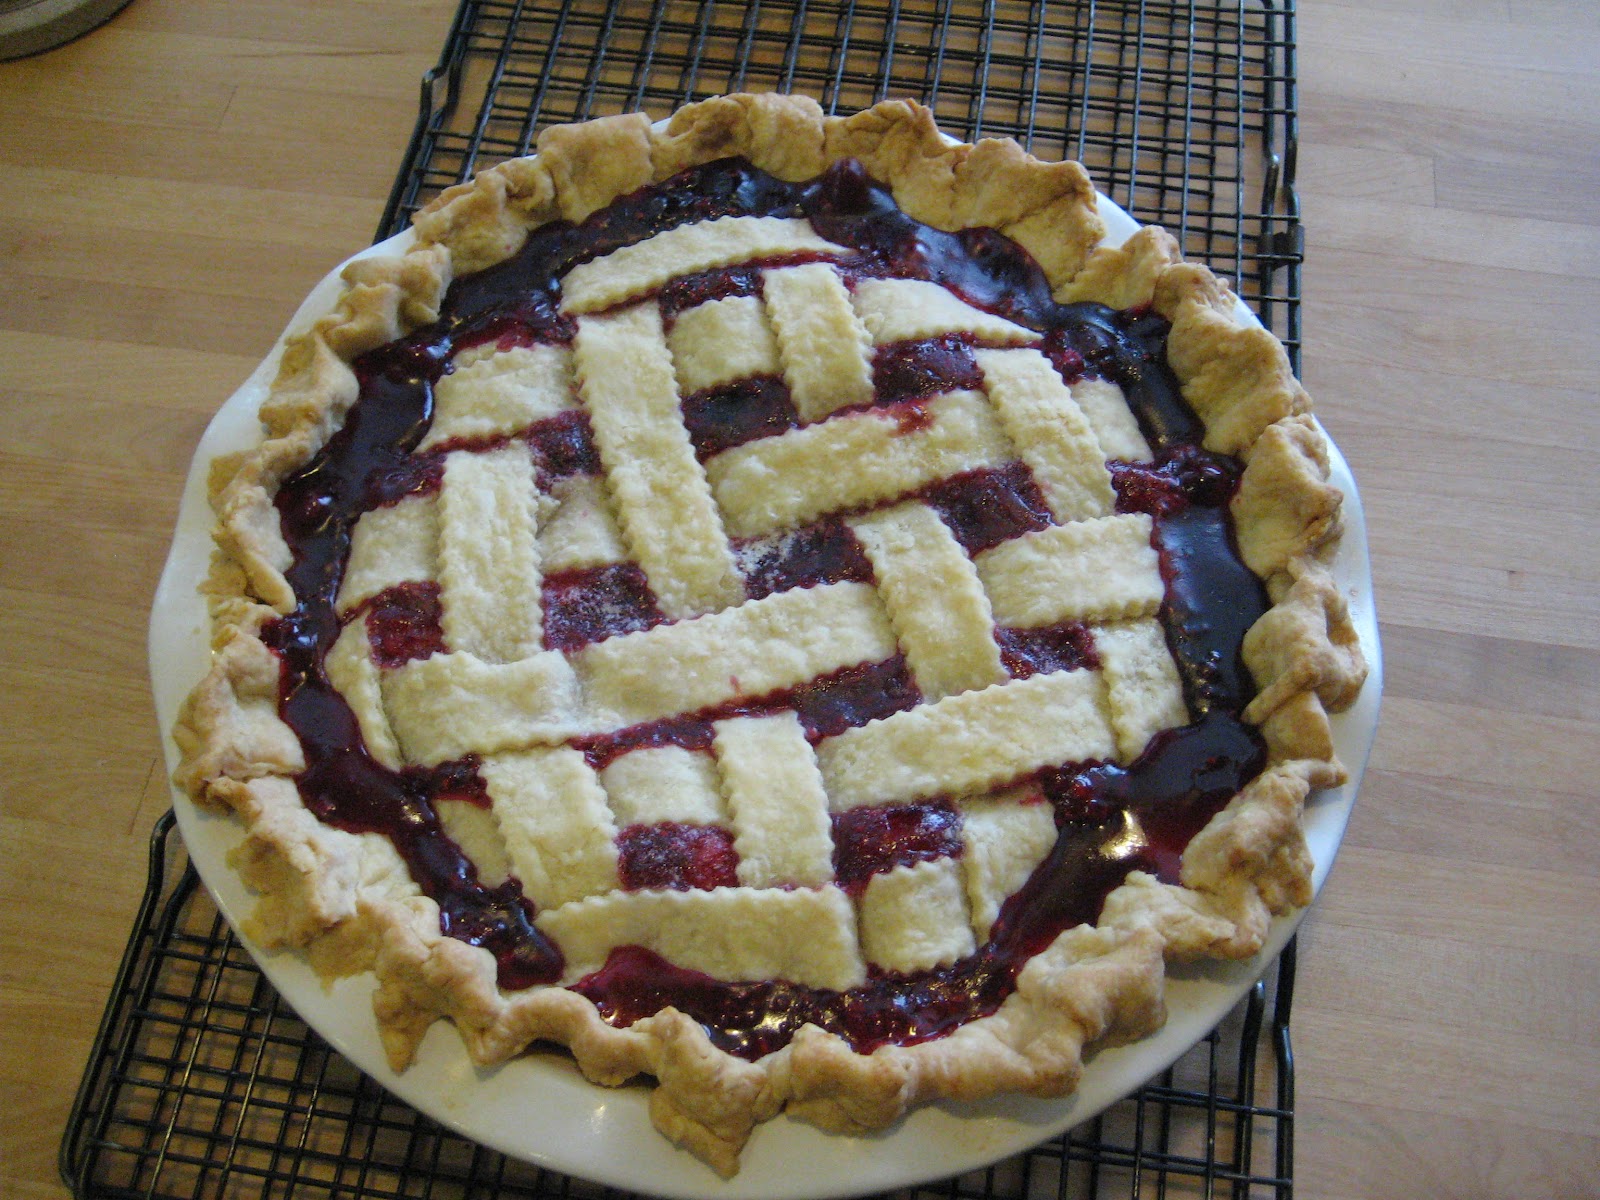
All that's left is seal the edges by dipping your finger in water and place it on the other side of the lattice on the edge and press together.  I am the worst at fluting the edges of a pie.  Sometimes I just use a fork, but I was rushed today and just used my finger.  Then you bake it and you end up with this:
The fruit filling bubbled over a little to the top, but that's ok!  This pie is great served with ice cream or whipping cream, but we just ate it plain and it was super yummy just the same!

I really encourage everyone to try making pie crust from scratch.  There are a ton of different recipes out there to choose, but they are all very similar.

Razzle Dazzle Berry Pie from John Michael Lerma
Crust:
3 cups all purpose flour
1 tablespoon sugar
1 teaspoon kosher or Hawaiian salt (I just use regular)
1/2 cup cold shortening, cut into small pieces
1/2 cup cold unsalted butter, cut into small pieces
1/2 cold water

  1. All ingredients should be cold. Combine all the dry ingredients in a large mixing bowl. Add shortening and butter. Using a pastry blender, cut in shortening and butter until the mixture resembles course meal.
  2. Drop by drop, add the cold water. Mix in with the finger tips not hands as the palms will warm the dough. Continue mixing water until the dough begins to hold together without being sticky but not crumbly.
  3. Divide dough into two pieces and place each in plastic wrap. Fold over plastic wrap and press down to form a disk. This will make rolling out easier after chilling. Place in fridge for at least an hour.
  4. Lightly spray a 9-inch pie plate with cooking spray. Roll out dough and place in pie plate. Return to fridge until filling is ready. Roll out top crust or use a pastry cutter to cut strips for a lattice crust.
Filling:
1 cup sugar
Dash of salt
1/4 cup cornstarch
1/2 teaspoon of ground cinnamon
1 cup blueberries
1 1/2 cup strawberries
1 cup blackberries
1 cup red raspberries
1/2 cup water
2 tablespoons freshly squeezed lemon juice, about 1/2 a large lemon
2 tablespoons unsalted butter

Note - You can use a different combination of berries - I omitted the blackberries and added more raspberries this time because that is what I had on hand. 
  1. In a heavy bottom saucepan, combine sugar, salt, cornstarch, and cinnamon. Stir in berries. Add water and lemon juice. Cook over medium heat just to the boiling point. Stir filling gently to shift the mixture to prevent scorching.
  2. Pour into chilled pie shell. Dot with butter and top with crust. You can apply egg wash and sprinkle with vanilla sugar. Bake at 350 for about 45 minutes or until the crust is golden.
There are some good tips about pie making here.

Tuesday, August 14, 2012

Perfect Circles by Lisa

Over the last year, I've become obsessed with decorating sugar cookies. I used to hate it, but now that I know how to use royal icing, it has become a very enjoyable pastime for me! One thing I've started doing is using round shapes with fluted edges and then decorating the inside. However, this requires a pretty steady hand at drawing a good circle for the interior design. And I really don't have good luck with that. BUT! I came up with a great idea for getting that circle perfect every time.


Before baking the cookies, I use a smaller round cookie cutter and gently press that into the dough on the cookie just enough to give me an outline to follow. Then when the cookies are out of the oven and cool enough for me to apply my border, I have the perfectly formed circle shape to follow along! No one can tell those guides were there once the cookie is all decorated, and I have nice even and consistently sized circles to show for it. :) (Now I just need to practice getting the circles centered! LOL!)


Thursday, August 9, 2012

(Great) Grandma's Pound - by Summer


I think that pound cake is one of those basic recipes that everyone should have and know how to make.  Usually it's easy to pull together with basic ingredients that you have on hand and it bakes at a low temperature for about an hour.  I've always made the recipe that is in my family - from my mom's grandma.  When we started baking through You Made That . . . there was a pound cake recipe in there.  It didn't turn out quite like what I was used to and it was made in a loaf pan.  The one I am used to making calls for a bundt pan.  My husband's family also has a pound cake recipe that's been passed down and apparently it's very similar to the one that my family makes.

This weekend my mom made some for us (as seen pictured*), but I assure you that I have made this many a times myself.  It's pretty no-fail and tastes great with strawberries and whipped cream.  But it's equally as good just all on it's own.

One tip that has made things easier is to buy the baking spray with flour and use that to grease the pan.  I have a really cool bundt pan that we got for our wedding.  It's a huge pain to grease by hand, so the spray makes it really easy to get all the tough corners!

Grandma's Pound Cake

2 sticks of butter
1 2/3 cup sugar
5 eggs
1 3/4 cup flour
1 tablespoon vanilla

Preheat oven to 300 or 325 degrees (I think I usually do 325). Cream butter and sugar until fluffy.  Add one egg at a time, beating well after each addition. Last add flour and vanilla, beat well.  Grease and flour a bundt pan.  Put batter in pan and cook for about an hour.

*Photo courtesy of Ron Blume - thanks Dad!

Tuesday, August 7, 2012

Fun With Layer Cakes - by Lisa

I'll be honest and say that baking and decorating cakes is not my forte. I generally leave that category to my very talented sister, Karla. However, every once in a while I get brave and/or ambitious and take a shot at doing a cake. One style that I am particularly smitten with is what I call the Magic Layer Cake. I think I came across the original entry from Whisk Kid via someone's post on Facebook. That particular version called for making 7 layers - each one a different color of the rainbow. The really neat part comes in when you cover the entire thing in white frosting. Unsuspecting guests are awed when you cut into the cake and reveal a very colorful inside!

I really wanted to try it, so at Christmas two years ago, I did a red and green version. It was my first time ever making a layer cake and also making the accompanying Swiss meringue butter cream frosting. (Whisk Kid's directions were fantastic!) For that cake, I used her recipe for the cake batter and then tinted half the batter red and half green. This was also when I was first introduced to the gel paste food coloring which changed my baking life forever! :) I made four total cakes and covered the whole thing in white frosting. The kids (my own and my niece and nephew) didn't see the cake in progress, so they had no idea about the inside! I had some red and green sprinkles and told them they were "magic" sprinkles that would change the inside of the cake. They each took a turn sprinkling the cake before it was cut. The reaction to the colors inside was awesome! And the whole thing tasted so yummy too.

Since it had been awhile since I made that cake, I decided to do something similar again. This time it was for my mother-in-law's birthday this past June. I made hers in orange and yellow and went with the simpler regular butter cream frosting. No sprinkles this time around, but like before the inside was a surprise to all!
I really like making this cake because it is so easy to customize for whatever occasion you need. Graduation colors, holiday colors, favorite colors...anything at all! You can also flavor the frosting if you so desire or even make it another color too.

Thursday, August 2, 2012

Chocolate Zucchini Cake - by Summer

Hi - anyone still here? As mentioned, we still want to keep this blog going, but it sure was nice to take a little break.  I decided to take a month off from baking.  I made a couple of things here and there, but the weather has been crazy hot, so I haven't even wanted to turn on the oven!

Summer time also means garden time! It's great to have fresh veggies, but quite often it seems like you end up with lots of stuff that you just don't know what to do! Zucchini can be one of those very things! I've made zucchini bread in the past, but really wanted something "sweeter"! I had this recipe in my desserts binder for a very long time. It's one that I typed up from somewhere, but have no idea where it originally came from!  A neighbor gave me a lot of zucchini and I thought it would be fun to try this cake.  It has chocolate in it, and it's a cake - how can you go wrong?  I also happened to have everything on hand, well, almost everything.  The recipe calls for sour milk.  If you don't have sour milk - I included a how to make your own (very easy).

I don't think I baked this quite long enough.  It was very moist - maybe too much so.  My husband thought it reminded him of a date cake that his mom used to make.  He thought it actually was baked long enough. It also needed more chocolate! While you have the cocoa in the cake part - I wanted more.  There are chocolate chips in the topping, but next time I will add them to the cake mixture. Unfortunately I took no pictures of this!  I was tempted to make again, since I still have zucchini, but I really don't need to eat more of it right now.  I will definitely make again because it was easy and yummy and it's gotta be healthy with the zucchini in it, right?


Chocolate Zucchini Cake
½ cup butter
½ cup oil
1 ¾ cup sugar
2 eggs 1 teaspoon vanilla
½ cup sour milk*
1 ½ cup flour
4 tablespoons cocoa
1 teaspoon baking powder
½ teaspoon cinnamon
2/3 teaspoon salt
2 cup peeled, shredded zucchini

Cream oil, butter and sugar.  Add eggs and vanilla.  Beat.  Sift dry ingredients together.  Add alternately with sour milk.  Mix in the zucchini.  Spread into a 9x13 inch pan.  Top with the topping (below).

Topping:
¼ cup chocolate chips
¼ cup brown sugar
¼ cup chopped nuts

Mix and sprinkle over top of unbaked cake.  Bake at 350 for 40 minutes.

*to make sour milk add 1/2 teaspoon of vinegar to 1/2 cup of milk. Stir and let sit for 15 min. You can also use lemon juice in place of vinegar.

Source - unknown